Enquiry Now

 Contact Us


 Check Out
 +44 20 4571 2395

 PRINCE2® Foundation and Practitioner Training


 Aaron Charlie
 5 Apr 2012
Creating Accessible PDFs with Adobe InDesign
One of the great things about PDFs is that they work with assistive technology like screen readers to allow people with disabilities to access your documents. Those with blindness, low vision or limited mobility do not always have the same access to the web that general users take for granted.
Using Adobe InDesign CS5.5 you can create and format your documents so that they are machine-readable for screen readers and assistive devices.
Not only does this make your documents accessible to more people but it also helps search engines successfully index your content – something you SEOs should be fully aware of!
Adobe InDesign is the industry standard document creation tool. However, it isn't the easiest to get to grips with. That's why our InDesign Training course is popular with those who wish to move away from basic Word documents to creating professional looking PDFs and eBooks. In fact, InDesign is steadily replacing Word as the de facto program for creating documents in businesses, therefore it is essential to upgrade your skills to meed demands. We also offer courses in other Adobe Creative Suite products including Photoshop Training, Illustrator Training and Premiere Elements Training.
Think of this guide as SEO (search engine optimisation) and AO (accessibility optimisation) for your documents.

Creating accessible documents is something that rarely comes into consideration these days, but if you think of it as a web page then you may be alarmed by how little thought goes into accessibility.
When building websites, developers think carefully about assigning tags and marking up the page for readers, and this is something we should start to do for PDF documents also. After all, if you want Google to index them you need to make it easy.
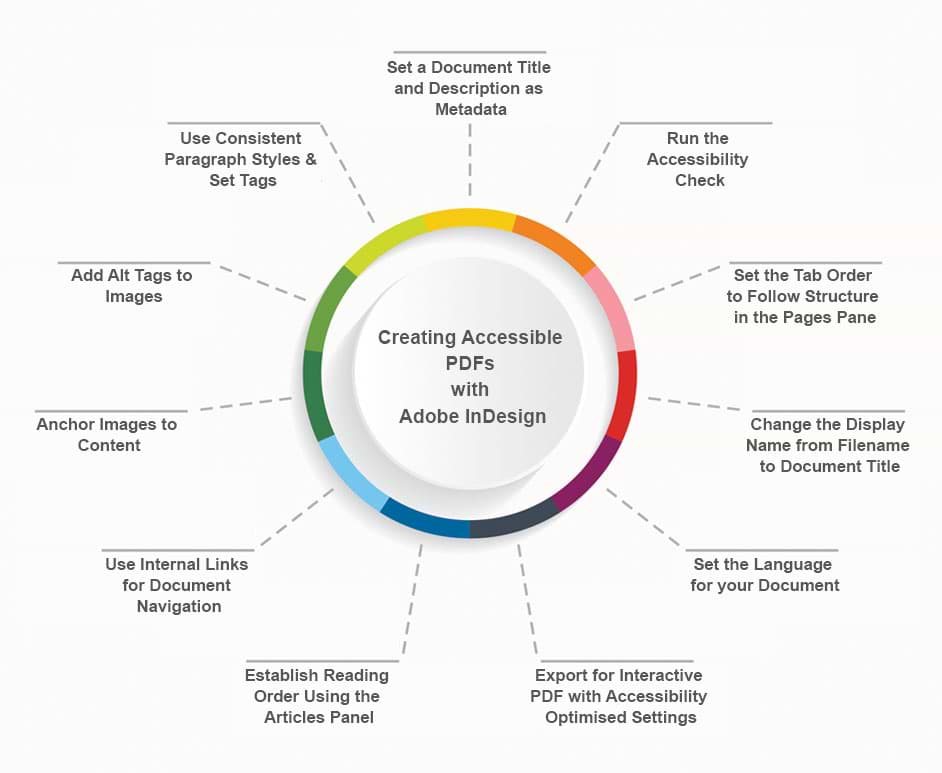
Here is the step-by-step to creating accessible PDFs with Adobe InDesign CS5.5:
Set a Document Title and Description as Metadata
SEO 101: Setting metadata is vital. The metadata is read by screen readers and by search engines to establish the title of the document and a summary of the content.
Use Consistent Paragraph Styles & Set Tags
Using H and P tags allows you to mark up which parts of your document are the most important. H1 would be the main heading, H2 for secondary heading, H3 for subheadings and so on. P is set for the main body text.
On a website, and
tags are used to set the formatting for text and draw the information from the .css stylesheet. When creating a PDF you can create your own custom paragraph styles in InDesign.
It is important for these styles to be consistent throughout the document not only because it looks better but because it makes it easier for assistive devices and search engines to read.
Here is a very basic example of a set of paragraph styles:
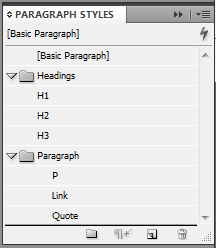
By only using these styles throughout my document I would be marking it up both for search engines and for screen readers.
InDesign CS5.5 allows you to assign a paragraph tag to each style. You can set paragraph (P) and different heading levels (H1-H6). This will then automatically mark up the document for you when you set a style for a chunk of text.
Try our Top 5 InDesign Tips for better practice.
Add Alt Tags to Images
Image alt tags are something we always bang on about to SEOs, but they don’t always listen! Alt tags are for describing an image to somebody who can’t see it.
This is essential for search engine optimisation as Google doesn’t have human eyes (although it is getting a lot better at reading images), and so you have to tell it what it is looking at so it can index your images.
The same goes for screen readers.
A blind person can’t view your image and so a screen reader would describe what it is. Leaving out the alt tags or using misleading tags (sneaky black hat SEO trick) not doesn’t provide any useful information to screen readers or to Google.
With InDesign CS5.5 you can use Object Export Options to specify alt text for you images by entering it yourself or choosing from the metadata attached to the image.
Anchor Images to Content
An able sighted reader can recognise the connection between an image on one page and text on another, even if the text surrounding the image is unrelated. Search engines and screen readers can’t, they see the image in the text

that accompanies it. So it’s rather unhelpful if the two are unrelated.
As a general rule you should place images next to the body text that describes
them. You can take this a step further with InDesign by placing your images within
text frames, attaching the image to a body of text without affecting the print layout.
Use Internal Links for Document Navigation
Websites wouldn’t be useful if all the information was on one long page with no easy navigation system. The same should go for documents.
If you are creating a 122 page document then you have to think about how easy it is to get to particular pages or sections. A standard print option is to have a table of contents. That works okay, but allowing users to click on the headings in your contents is a lot better. If you are cross referencing a lot throughout your document then add in internal links to help you readers navigate. This also helps screen readers navigate throughout the document.
Establish Reading Order Using the Articles Panel
This brand new feature for CS5.5 allows you to establish an order to the content on a page. You simply drag and drop the objects onto the Article panel in the order they should be read.
By default, screen readers digest content on a page in a linear fashion. The Article panel allows you to dictate the order so that you can concentrate on an attractive design.
Export for Interactive PDF with Accessibility Optimised Settings
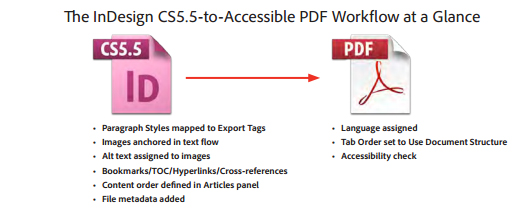
When you export your document as an Interactive PDF, the tagging, organising and bookmarking established in the layout becomes the tagging structure, order and navigational tools of the resulting document.
If you produce documents on a regular basis then use our InDesign Templates tutorial to the set the standards for all the documents you produce.
The next steps are done in Adobe Acrobat Pro X to finish your document for publication.
Set the Language for your Document
You must specify the document language for screen readers; this is done in the Advanced options of Acrobat’s Document Properties dialog.
Change the Display Name from Filename to Document Title
The default setting is for Acrobat to display the filename in the document window title bar. Replacing this with the title of the document makes it more accessible. Do this by entering the Document Properties dialogue in Initial View and select Document Title instead of Initial View.
Set the Tab Order to Follow Structure in the Pages Pane
Acrobat will ignore the structure that you established using InDesign’s Articles panel unless you tell it otherwise. Choose Page Properties from the options menu and set Tab Order to “Use Document Structure” to tell Acrobat to use your specified tab order.
Run the Accessibility Check
The final task is to make sure that your PDF is fully accessible. Run a Full Check in Acrobat’s accessibility tools. If you have followed the above steps successfully then your document should be error-free and fully accessible.
Posted under:
 Need Any Help?
Recent Blogs