Enquiry Now

 Contact Us


 Check Out
 +44 20 4571 2395

 PRINCE2® Foundation and Practitioner Training


 Heather Buckley
 12 Aug 2011
Exposure Bracketing in Photoshop - Cheat using RAW
HDR (High Dynamic Rage) Images have become rather popular of late, with the latest iPhones using the feature in their camera technology. I've found that not everything looks great with the exposure spread throughout and it can make the image look weird and unnatural. Trouble with exposure bracketing is you need to take at least three pictures at different exposures, and it's best done with a tripod. Not that useful for street photography so here's a little cheat that gets great results.

In this tutorial I am going to show you how to get more drama from an image by using bracketed exposures. This technique is very useful when you are in difficult light/ exposure conditions, it allows you to be in control of how much detail you want, or don’t want, in your image.
What is Exposure Bracketing?
Exposure Bracketing is when you take a normal photo and then take two more, but under-expose one (normally -1 or -2 stops) and over-expose the other (usually +1 or +2 stops). You can take more and you can change the amount of stops depending on how much detail you want, but 3 images is normally sufficient.
How to cheat at Exposure Bracketing in Photoshop
There are two ways of putting an HDR image together, you can import your chosen images into Photoshop and use the ‘Merge to HDR’ tool (I admit I have used it before, but I don’t really like it) or you can use masks to retrieve the details from the highlights and lowlights.
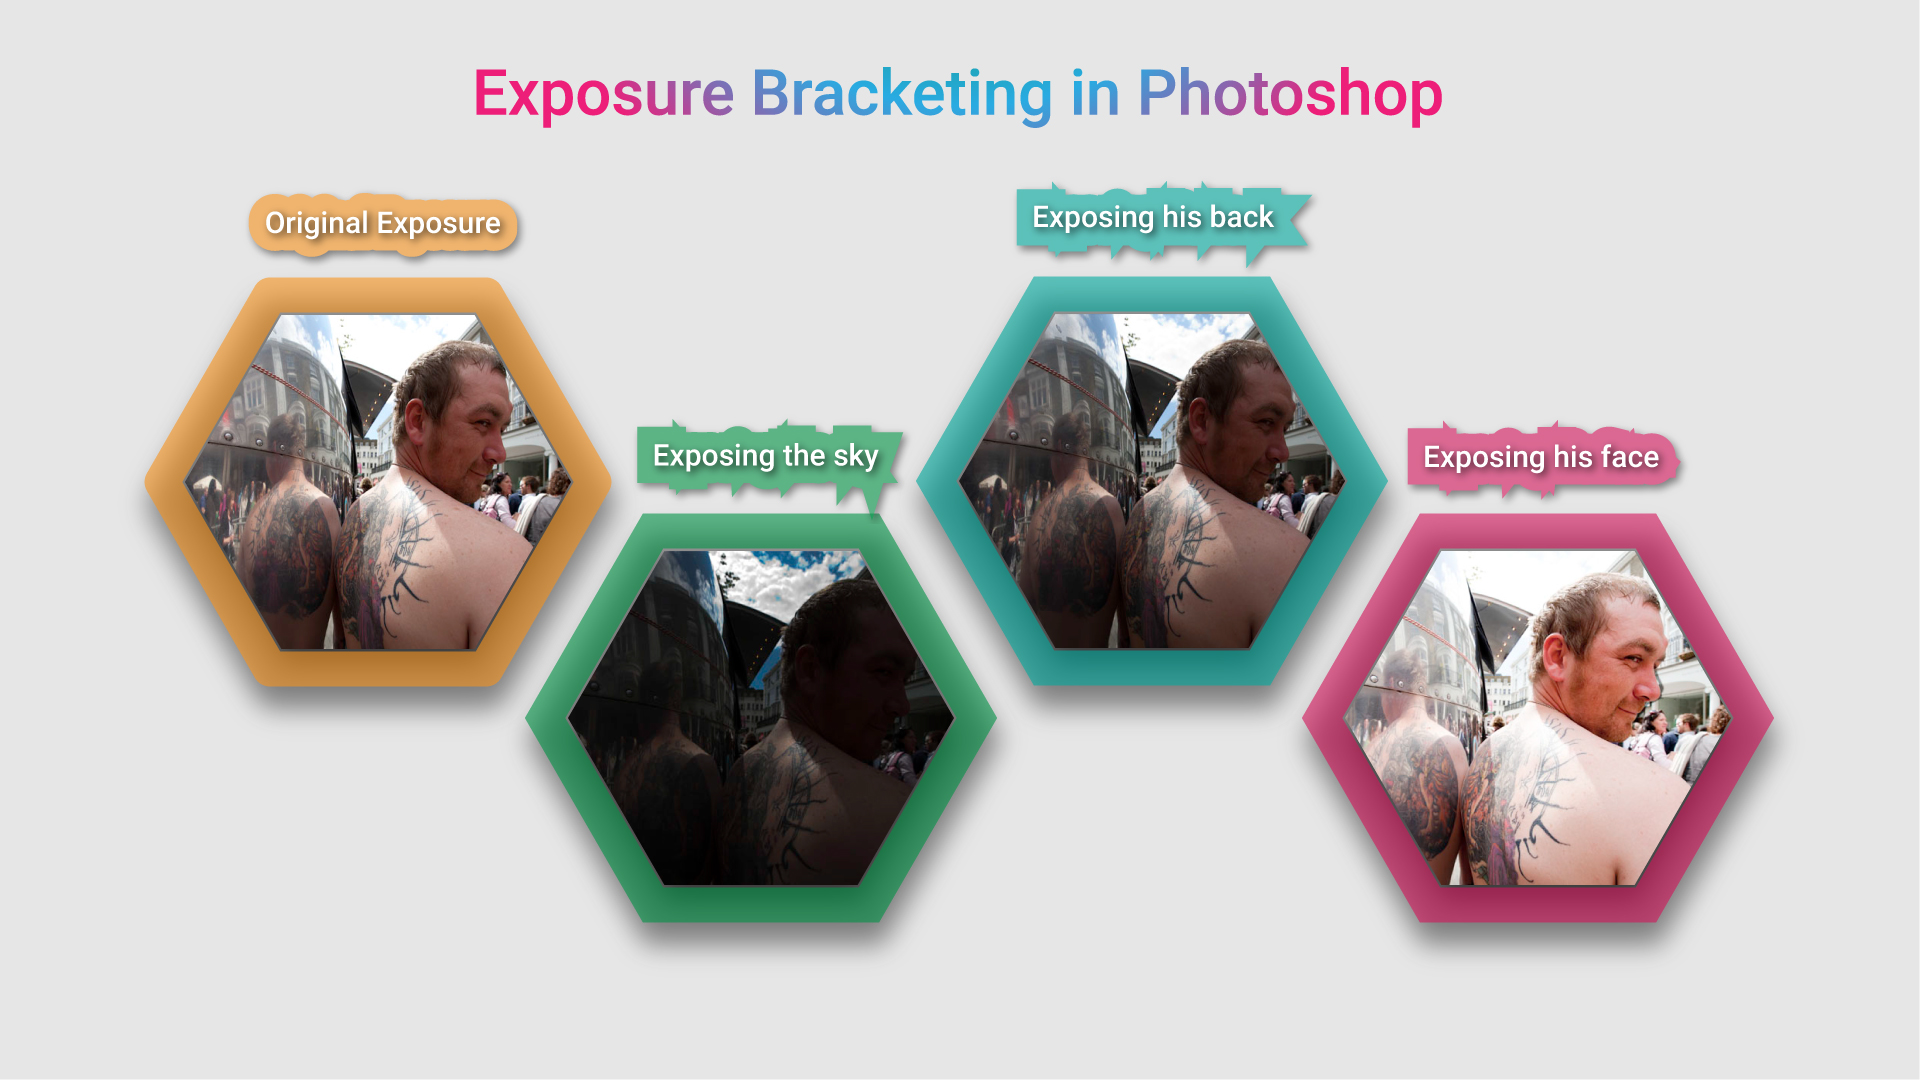
The image above originally looked like this:

Original Exposure
To start with I asked if I could take a picture of this man's hoodie reflected in the bus, but he then suggested he stripped and of course I couldn’t refuse such an offer! I liked this image but it was lacking drama; you can’t see the sky, his face and some of his back is quite dark and the crowd is distracting to the eye.
I’ve used Lightroom here to underexpose the original image (of course, another option is to use Camera Raw) so that I can see the detail in the sky. I then opened this up in Photoshop

Exposing the sky
Then I exposed the original image for the detail on his back and opened it up in the same Photoshop document using a new layer.

Exposing his back
Using the original image again, I exposed his face, then I added a new layer in the same Photoshop document and added it to it. Now I have all three layers exposed differently in Photoshop.

Exposing his face

- I placed the over exposed image (exposing the sky) at the bottom of the layers and left it alone.
- I then added masks to the exposed back and face layers by clicking on the Quick Mask icon, you need to select the layer first.
- Next, hide the top layer by clicking the eye next to it.
- Select the mask on the middle layer and brush black the parts of the image where you want to show the layer underneath and leave the parts you want to show on this layer white.
- If you want sharper lines for your selections you may want to use the selection tools and then fill with black, if you want to soften the selection, paint the edge afterwards with a softer brush.
- If you only want some of the underlying image to show, try playing with the opacity of your brush strokes.
- Once you have finished the middle layer, do the same with the top layer.
- Trial and error is a key part to getting the exact look you are after with your final image.
- I have finished the image off in Lightroom as I find it more flexible. I’ve used the Punch effect to increase the clarity and then converted it to Black and White.
Posted under:
 Need Any Help?
Recent Blogs