Enquiry Now

 Contact Us


 Check Out
 +44 20 4571 2395

 PRINCE2® Foundation and Practitioner Training


 Aaron Charlie
 15 Jul 2014

Photoshop Perspective Warp Tutorial
Perspective Warp is easily my favourite new feature of the 2014 Photoshop CC update.
Imagine you take a photo and in post-processing you think 'I wish I'd taken that on the other side of the building!' - well now you can retake your photos with Perspective Warp.
Before we get started, choose a photo to work on. I've found that the process works best with photos with clear straight edges in.
If you want, you can download and use our sample photo to follow along with the tutorial.
To learn more cool Photoshop tricks, our;1-day Photoshop workshop is the best place to start.
Please note: this tutorial only works on the 2014 version of Photoshop CC. Open your Creative Cloud app to download the latest version.

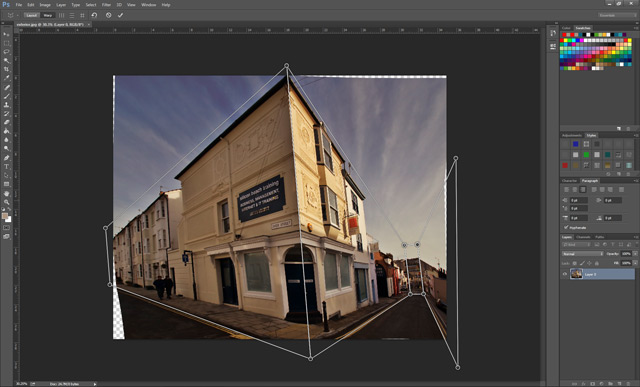
Open your photo in Photoshop CC. Click Edit > Perspective Warp.
A prompt box will appear telling you to draw two 'planes' - these are the frames that you will use to map out the current perspective of your photo.
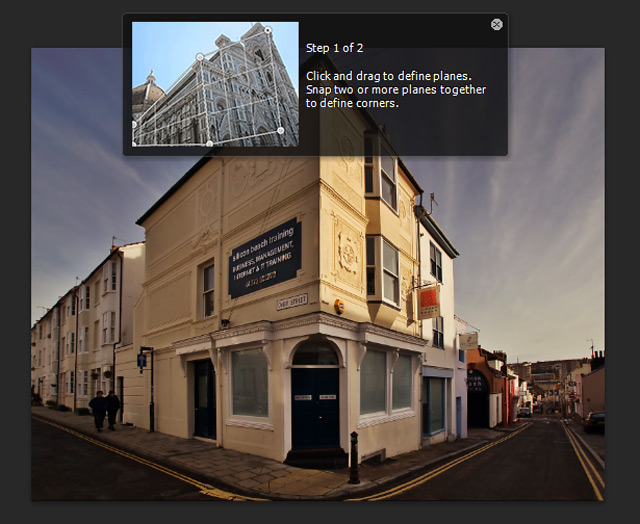
At first these will just be squares. Many photos will only require two boxes, but as you can see below this image requires four to avoid distorting the buildings on the right.
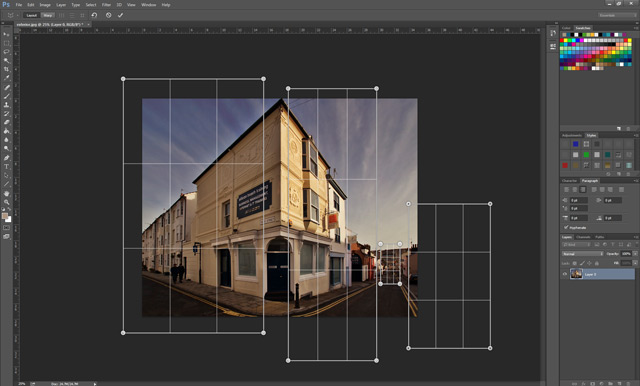
Click and drag the corners to align to the straight edges in your photo and snap together the planes to define the perspective;(a blue outline will appear to confirm the join).
Look for strong edges to draw around, such as the roofs of buildings, pavements etc.
It is possible to only draw planes for the buildings on the left, but when you come to change perspective the street and buildings on the right will become distorted - ruining the effective of changing perspective.
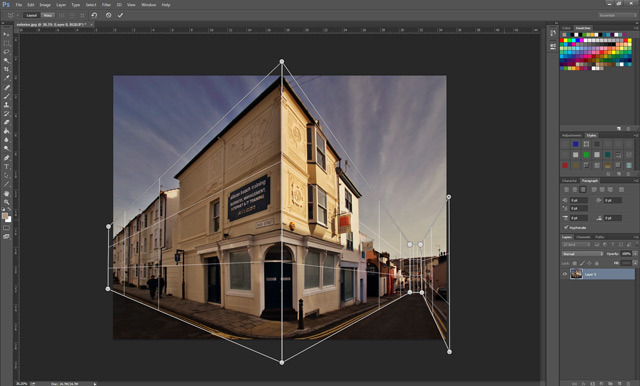
Once you're happy with your planes, select 'Warp' from the tool bar to start playing around.

In Warp, you can move corners around independently, but you usually end up with something like this:
Everything goes a bit out of line.
A much better way to change perspective is to hold shift and left click on the vertical line that you want to move.
The line should go yellow and now when you move the corners the image should stay upright.
Doing this to our sample image now gives us amazing control over where the photo is taken.
We can move our 'photographer' to the right or left, as shown below, just by dragging the line around.
Photo 'retaken' to the left:
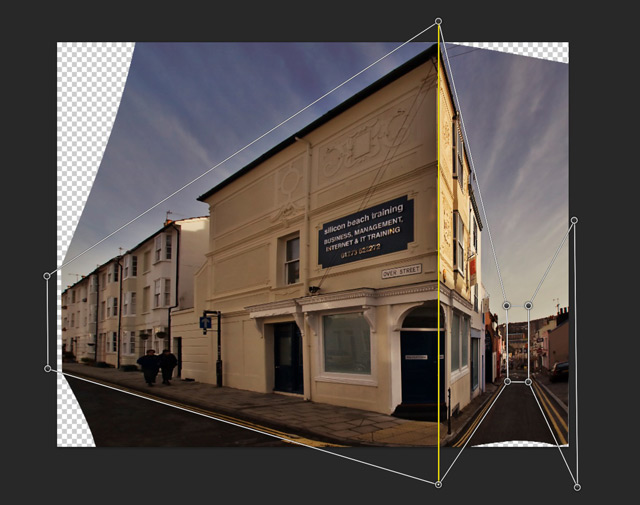
Photo 'retaken' to the right:
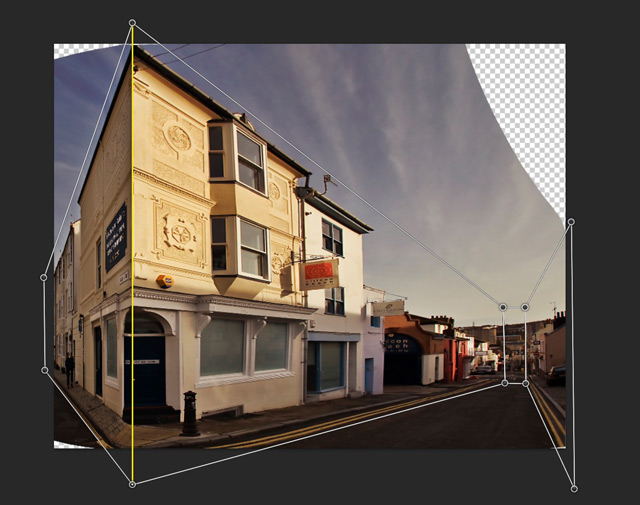
Once you're happy, click the tick to apply the warp and then crop out the missing parts of the image to complete your new 'retaken' photo.
How neat is that?
Don't forget to check out our other Photoshop blog posts for more tips and tutorials.
Posted under:
 Need Any Help?
Recent Blogs